INSTRUCTIONS FOR ADDING A CALENDAR EVENT
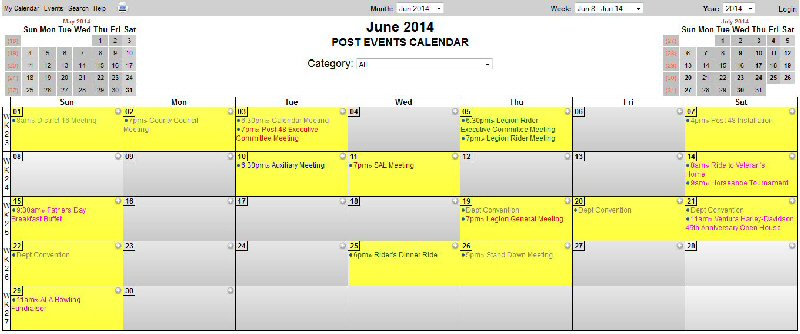
Step 1 From the Menu navigate to the CALENDAR, you should see a page similar to the one below.
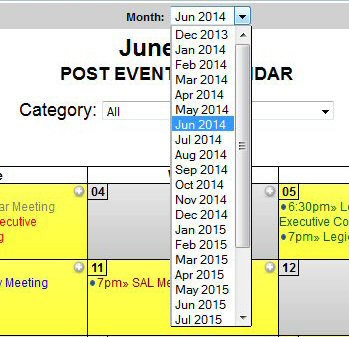
 Step 2 From the Pull-Down Menu navigate to the Month and select for which you would like to make an Event entry, you should see a sample below.
 Step 3 Click the small gray button on the day which you would like to make an Event entry.
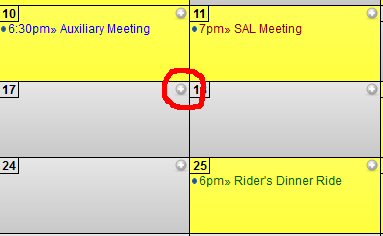 You should see a screen similar to the one below.
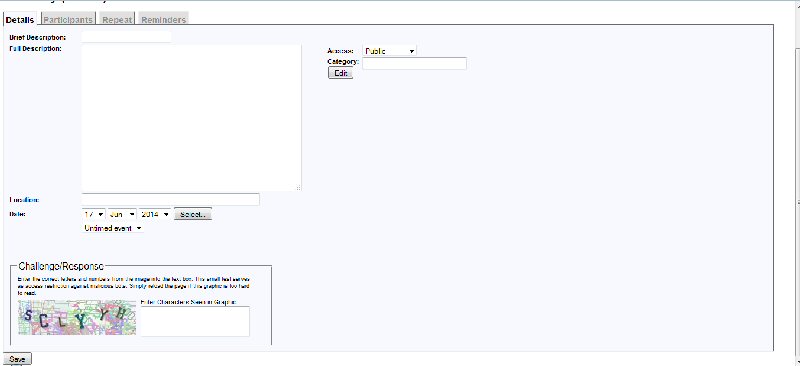 Step 4 Now you will enter your Event; Start by entering a very "brief description" of your event. This is what will show on the Calendar. It can be as simple as "Auxiliary General Meeting", "ALR Dinner Ride" Etc. You will have ample opportunity to add Event details later.
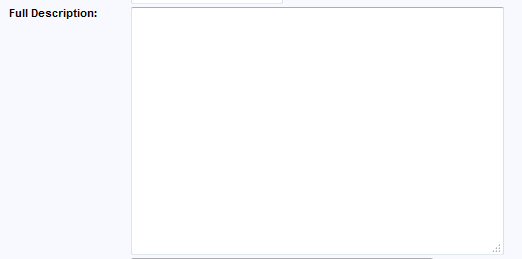
 After entering your brief description you can use the box below to enter a detailed full description of your event. It is not necessary to put the time or address of the event as you will have a place to add this information later.
 After you have written your detailed full description it is time to tell people where it is. in the box titled "Location" shown below, enter the address of your event. This allows the viewer to know exactly where your event will take place. It also allows them to get precise driving directions from Google Maps or Mapquest as an example.
 Step 6 One of the Calendar features is the ability to view the Calendar with a filter that allows you to see only Events in a selected category. For example let's say you just wanted to see all "Legion Rider Meetings". When viewing the Calendar you would select from the "category pull down menu" at the top of the Calendar "Legion Rider Meetings" as shown below.
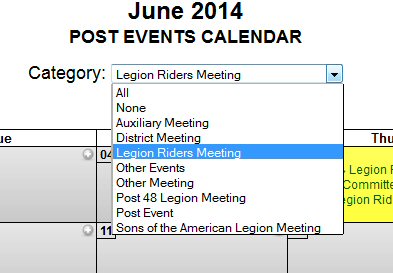 Then only "Legion Rider Meetings" would appear on the Calendar. After you exit from the Calendar the category returns to its default of "All" categories. To facilitate this feature in the Event you wish to post. We must assign a category.
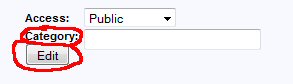
On the screen towards the right you will see the "Category" Box. Select the "Edit" button see below.
Then only "Legion Rider Meetings" would appear on the Calendar. After you exit from the Calendar the category returns to its default of "All" categories. To facilitate this feature in the Event you wish to post. We must assign a category.
On the screen towards the right you will see the "Category" Box. Select the "Edit" button see below.
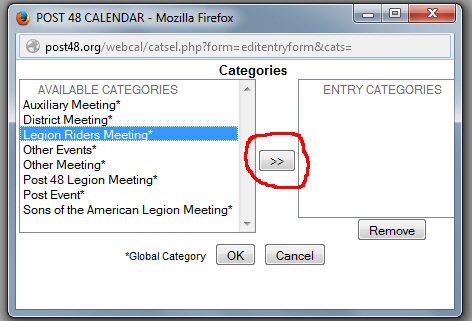
 After selecting the "Edit" button you will get a pop up box as shown below.
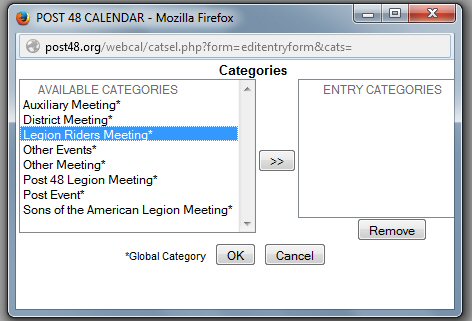 Select the category for the Event you are posting, in this example we have selected "Legion Rider Meetings". After you have made your category selection there is a button that moves your selection from the left box to the right box. Click this arrow as shown below.
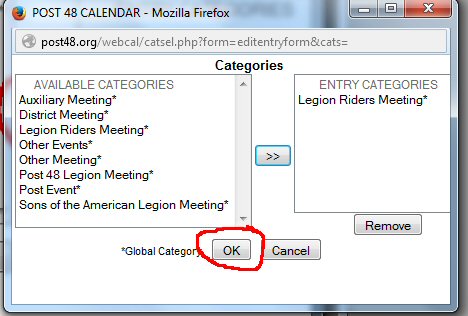
 After you have moved the category to the right box, Select the "OK" button.
 Step 6 Now you will set the time for your Event. By default Events are un-timed Events.
 If your Event is an un-timed Event, nothing more is required and you can skip to Step ?.
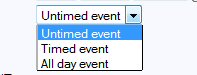 If your Event is an all day Event; from the Pull Down Menu select "All Day Event" and skip to Step ?.
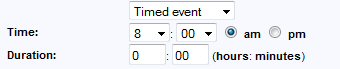
If your event is a timed event select from the Pull Down Menu select "Timed Event". After you make this selection additional boxes will appear allowing you to indicate what time the Event starts and how long it will last as shown below. Here you will enter the starting time of the event and how long the event lasts. Be sure to mark AM or PM
If your Event is an all day Event; from the Pull Down Menu select "All Day Event" and skip to Step ?.
If your event is a timed event select from the Pull Down Menu select "Timed Event". After you make this selection additional boxes will appear allowing you to indicate what time the Event starts and how long it will last as shown below. Here you will enter the starting time of the event and how long the event lasts. Be sure to mark AM or PM
 If your Event repeats on some regular basis there is a tool to allow you to set the repeats. For an example your Event repeats every month on the third Tuesday of the month. The tool allows you to indicate this therefore eliminating the need to manually make an Event on every third Tuesday.
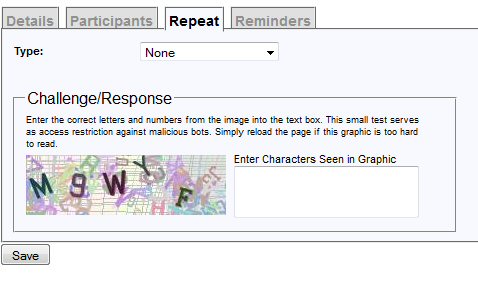
At the top of the page you will see tabs, one of these tabs is marked "Repeat" as shown below.
 Select this tab. your screen should appear as the one below.
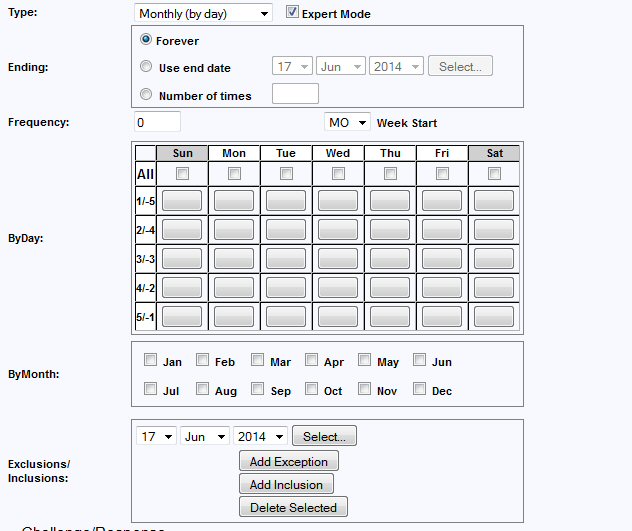
 On the pull down Menu marked "Type" we will select for this example "Monthly (by day)" see example below.
 After making this selection your screen should look as the one below. If it does not be sure the box titled "Expert Mode" is checked.
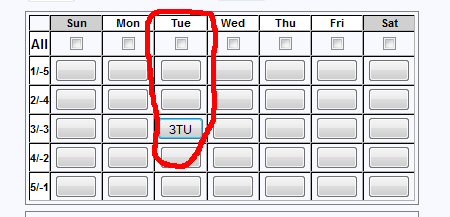
 For our example we want the Event to appear every third Tuesday of the month so we will select the button that represents the third Tuesday of the month. Clicking the button will result in the selection shown below. If you have made an error click the same button until it is blank again.
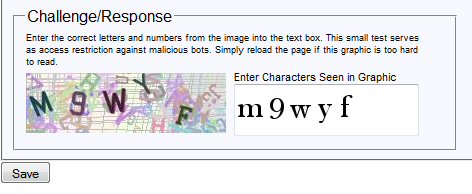
 Step 7 Your Event by now is completed and ready for submission. There is just one more thing to be done. The Calendar is accessible to anyone on the Internet. As a result there are two security measures in place to prevent hackers or anyone from posting unwanted Events to the Calendar. One security measure is something called "CAPTCHA" which is an acronym for "Completely Automated Public Turing test to tell Computers and Humans Apart". You will see a graphic image that has letters and numbers in it. As shown below.
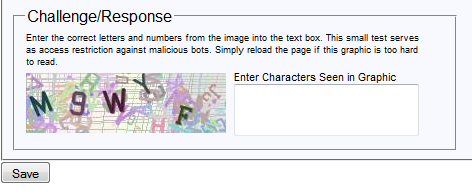 Enter the alpha numeric characters in the box marked "Enter Characters Seen in the Graphic". The entry is not case sensitive so you do not have to use caps. In our example your entry would look like the sample below.
 In the event you mis-type the entry it will give you another code until the entry is correct. NOTE: The Calendar program sends a cookie to your computer after a successful Event entry so it knows your particular computer provides a safe entry. For this reason you may not see a "CAPTCHA" requirement the next time you make an Event entry.
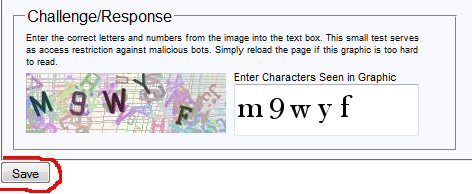
Step 7 The final step is to select the "Save" button at the bottom of the screen.
In the event you mis-type the entry it will give you another code until the entry is correct. NOTE: The Calendar program sends a cookie to your computer after a successful Event entry so it knows your particular computer provides a safe entry. For this reason you may not see a "CAPTCHA" requirement the next time you make an Event entry.
Step 7 The final step is to select the "Save" button at the bottom of the screen.
 The last security measure is your Event entry or anyone's Event entry will not show on the Calendar until it is reviewed by a Web site administrator and approved. Once it is approved it will show immediately.
Note: These instructions may appear overwhelming and suggest an Event entry is difficult. It is not difficult, these instructions have been written to accommodate the novice. Once you have made one or two Event entries you will see it is quite easy to do. If you need help you can always send an Email to the Web Master at webmaster@post48.org or contact the Adjutant at adjutant@post48.org and get assistance.
The last security measure is your Event entry or anyone's Event entry will not show on the Calendar until it is reviewed by a Web site administrator and approved. Once it is approved it will show immediately.
Note: These instructions may appear overwhelming and suggest an Event entry is difficult. It is not difficult, these instructions have been written to accommodate the novice. Once you have made one or two Event entries you will see it is quite easy to do. If you need help you can always send an Email to the Web Master at webmaster@post48.org or contact the Adjutant at adjutant@post48.org and get assistance.